Hi everyone, how has your week been so far? Mine has been so busy! But I took little breaks to play now and then with some dandelion stamps and that’s really made it fun.
I’ve had a bunch of ideas for using dandelion stamps running around en my brain ever since I took this photo — waaaaay too many ideas to try at once! So, I decided to focus on using the misting technique — this is where you ink a stamp and then mist it with water before stamping it on paper. It always seems to make cool results! The only trick is to use a bottle that has a fine mist. The first time I tried it, I used my laundry spray bottle and that just didn’t work out — can you say blobby beyond recognition? Ha! I added perfect pearls to my water to add a little sparkle and sheen that you can’t see in the photos (darn).
I had so much fun, I just wanted to keep stamping and stamping and stamping and — well, you get the idea. I picked my favorites and turned them into cards.
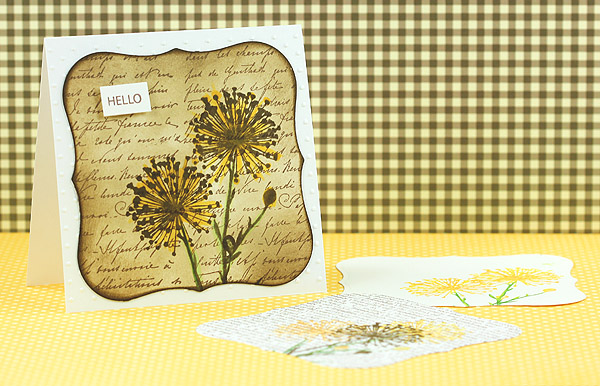
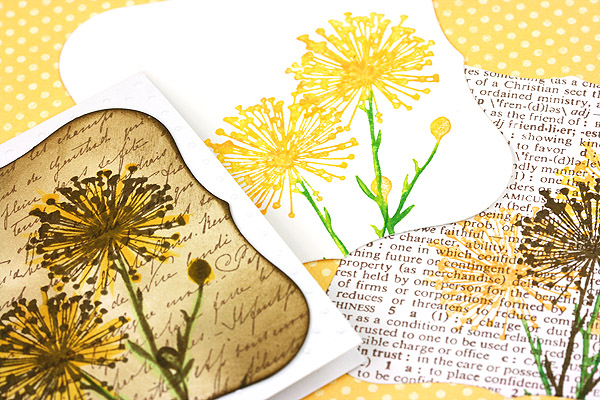
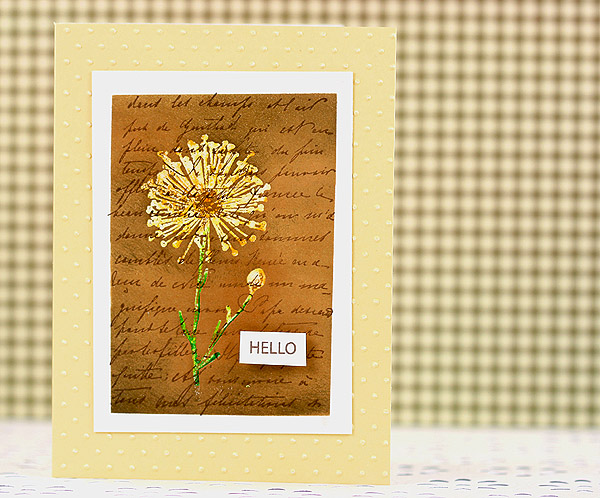
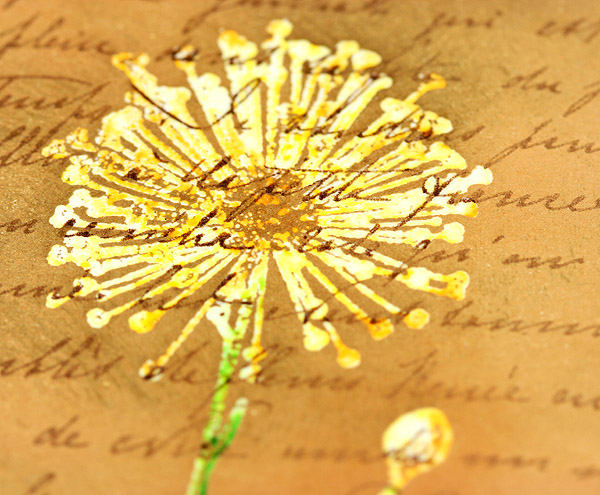
For this one, I die cut a shape out of white cardstock, then stamped a dandelion on it twice using walnut stain ink. (Full supplies at the end of the post.) Then I rubbed distress inks all over the background, and stamped again with old writing in a lighter brown. Then I went over it with markers. Fun! Here’s some variations on this one, I’m going to make them into cards too!
Love them all!
Next up is a trio of cards using a giant stamp that can cover a whole card in one swoop — although I trimmed them because I wanted a little edge.
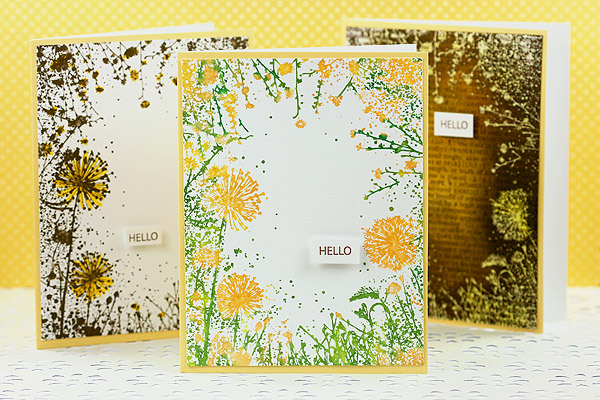
Here’s a closeup so that you can see the three variations:
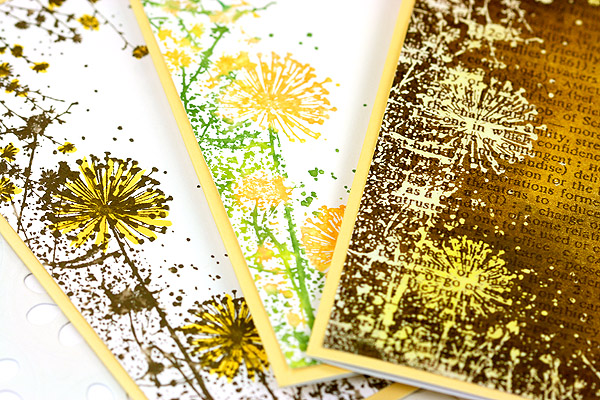
For the left card, I stamped and misted with walnut ink, but left the background white so that it really pops!
For the one in the middle, I used markers to color the flowers yellow and the rest in various greens directly on the stamp like so:

Then I misted and stamped. I have been wanting to try that in forever!
And for the one on the right, first I stamped a definition in dark brown ink. Then I did something that’s new to me — I applied clear embossing ink to the stamp, then colored parts of it with markers, then misted, stamped and embossed in clear. Then I rubbed on distress inks. I like how it looks — been wanting to try this in forever too.
And I wasn’t done yet…
For this last card I really wanted to focus on the the new-to-me technique: first I stamped the old handwriting in the background. Next, I applied embossing ink all over the dandelion. Then I colored directly on the stamp with markers, then misted, stamped it, and embossed in clear.
Then I got a little tricky and made a white frame around the stamped part using post-it notes, then rubbed on brown inks — the embossed dandelion will resist the brown inks — just wipe off with a paper towel. Here’s a closeup so that you can see it better:
Supplies: All stamps are by Hero Arts. Here’s a list in case you want to find them:
- Woodblock Silhouette Burst – this is the single dandelion used in the first card
- Cling Dandelion Frame – this is the one used in the second group of cards — it covers the whole front of a card in one swoop
- Cling Friend Definition – used in a few backgrounds — this stamp is so versatile
- Woodblock La Letter – it’s the handwriting background of the last card
- Clear Leaf Prints – for the “hello” message — love that font, so clean and simple
I used various Tim Holtz Distress inks on each card — didn’t keep track, sorry! But they may or may not include: tea dye, antique linen, walnut stain, and vintage photo. I also used Momento rich cocoa to stamp the friend definition and the handwriting.
You can use any water based markers for the water misting technique (if you use alcohol inks like copics, you can mist with the colorless blender solution). I used Momento markers in cantaloupe, dandelion (go figure!), pear tart, cottage ivy, and bamboo leaves.
The die cut is Labels One by Spellbinders. VersaMark clear embossing ink, and clear embossing powder. Whew, I think that’s everything!
Do you ever make huge batches of cards like this, just by playing around with a technique? I’d love to hear if so!
Can’t wait to send these out and make people smile,
Love that new technique – you’re an inspiration! Thanks