I’m often asked how I create the backgrounds in my photographs of cards and other crafty projects, so I thought I’d write up a tutorial to share. (If you’re new to my blog, I have more handy photo tutorials here.)
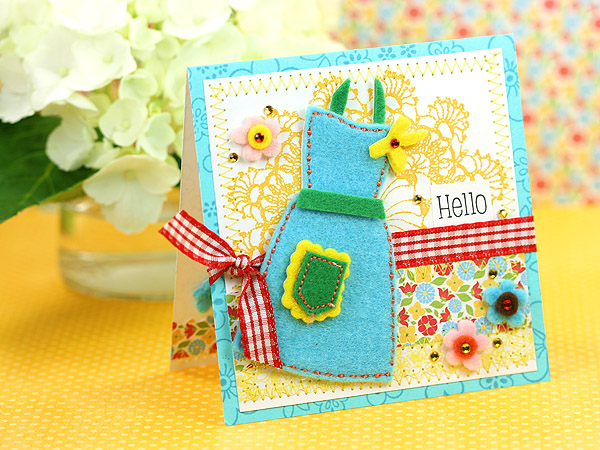
I’ll start by showing you what the finished photo looks like, so here it is!
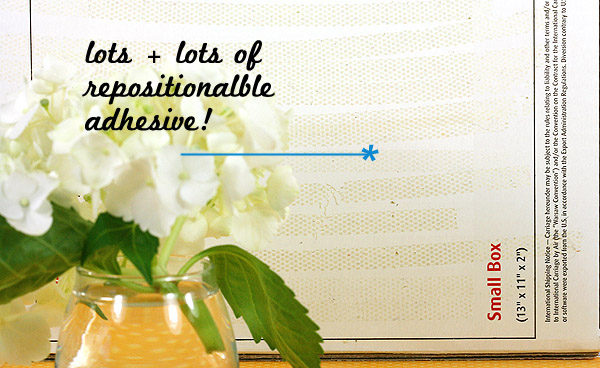
The secret to that background? It’s just a box! Here’s my setup

I used a small UPS box, but any old box that will hold your paper will do. Apply a roller type adhesive to the top and bottom parts of the box — I’ve been using the box for about 2 years now and it’s still going strong! By using a re-positionable adhesive you can easily switch out the papers. (Note: I used Kokuyo Dot ‘n’ Roller re-positionable adhesive, but it’s sadly no longer made.)
Here’s a closeup of the adhesive so you can see it better — not that I was particularly neat + tidy or anything, ha ha!
When I want to use it, I stand the box up, pushing it flat against the wall to make sure that it’s straight. Then I put the pretty paper on it, by putting the bottom edge of the paper along the table (so that it’s even) and then sticking it to the box.
Sometimes I lift the box up and add another piece of pretty paper underneath, making sure it’s lined up with the box.
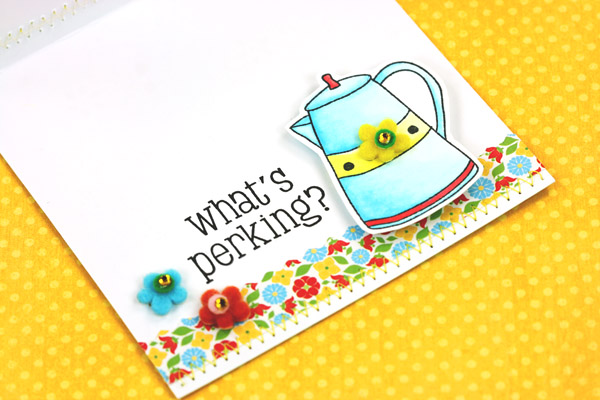
That bottom piece of paper is great for taking pictures of the insides of cards, like so
And that’s it!
(Supplies: Flower paper by GCD/Melody Ross, yellow polka dot paper by Bo Bunny, doily, coffee pot, hello and what’s perking stamps by Hero Arts. I used Copic markers to color the coffee pot. All felt goodness by Basic Grey. Ribbon from my stash.)
Do you have a setup that you like to use? I’d love to see it!
Just saw your post from the homework forum over at Blogging Your Way. I STICK at displaying items I want to blog about, this is BEYOND helpful!
Your card is adorable Lisa! Thank you so much for the brilliant tutorial. I’ll have to try this the next time I’m taking a photo.
BRILLIANT card! Thanks for sharing!
Wow I would never have thought of that in a million years. Very clever. Thanks for the tutorial, Lisa.
Thanks for the great photo tip, Lisa….it’s much more efficient than what I’m using. I’ll be incorporating your set up. Loving that sweet card too, just love the what’s perking sentiment stamp!
Love your card and ALL of your tutorials! Thank you for taking the time to share this with us! You’re the BEST and your cards and photos always make me SMILE!
Lisa this is super clever! I am going to link to this in my photo class, excellent!
Lisa, thanks so much for sharing your technique. Adore the card.
Hi Lisa. I have popped over from the BYW class. I am super-impressed and inspired by this little trick of yours. And your card is adorable!
Great tutorial!
LOVE LOVE LOVE this card….you have such a way with Felt!! Perfect Lisa…….
Super sweet tut! My new project for this coming week…
This is so great! Very similar to what I do… some days I think I spend more time trying to get a photo I love than I did actually making the card! BTW- your card is ADORABLE!!
thanks for revealing the “secret.” your card is fabulous, love the felt apron!
Excellent show & tell!!!
Thank you for the tutorial! Here’s how I take my crafty projects: http://www.creativityinprogress.com/blog/this-is-how-i-shoot/
Too cute for words!!!
I love it!!!!
So clever!
Firstly your card is GORGEOUS!!!!
Thank you SO much for this little tutorial. I’ve been faffing about trying to get cardstock to stand up so I can photo my cards. I have even resorted once to getting my daughter to stand underneath a table to hold it from behind!! This is a FAB idea!! :o)
Wow, what a great photo tip! I really do need to spice up my photography with some neater backrounds!