Hey hello! Welcome to my stop on the Hero Arts + A2Z Scrapbooking Digital Blog hop, so glad you’re here. If you’re already hopping along, you should have arrived via Kymona’s blog. If you’re just now joining us or encounter any broken links you can always head back to the start at Hero Arts. Here’s the full list:
Hero Arts
Tami Hartley
Kelly Latevola
Kymona Tracey
Lisa Spangler <<< YOU ARE HERE
Michelle Liimatainen
Kathy Wade
Lucy Abrams
Chitra Nair
Char K
Ruth Bosner
Jocelyn Olson
Zoey Scarpelli
Stephanie B
Kelly Rasmussen
a2z Scrapbooking
Currently, A2Z Scrapbooking offers a selection of Hero digital, but in the coming weeks, they will be adding to their collection and stocking the entire Hero Arts digital range. To celebrate the new collaboration, a number of artists from A2Z and Hero Arts have teamed up to provide you with a whole host of inspiration and fun. Just hop along and see how digital products can be used!
So, now that the bookkeeping is out of the way, on with my card! My Dad lives in Ohio and they got hit by a week of rain and cold weather, so he asked me to send him some sunshine. I wanted to make a big ole thundercloud but my stamps just weren’t BIG enough. Enter the Hero Arts Weather Cuts kit, and boom crash — fast as lightening I had my digital hybrid card :)

It was really super easy to do, thanks to the trace function in the Silhouette. Here, let me show ya.
Step 1: Silhouette Storm
I began by opening the PNG file of the distressed cloud that’s included in the kit. See how the distress bits are pretty small? This would work great for home decor if you sized it to 8.5×11 — but I wanted it to be small enough to fit on a card. That’s where the handy trace function comes in! The best part is that you can use this technique to trace any PNG file that you like — tons of possibilities.
After I had the file loaded, I selected the trace area, then unchecked the High Pass Filter, and cranked up the Threshold to 100%.

One that was done I hit Trace Outer Edge and I got my cut lines without the distressing. Easy, right? At this point you’ll have the outline and the original PNG image on top of each other. Go ahead and delete the original PNG image as we no longer need it.

From here I just sized the cloud so that it was 4.25″ across so that it would fit in an envelope. Then I cut it out of white cardstock. I went ahead and cut out some lightening bolts (also in the kit) from yellow cardstock too.
Step 2: Mist!
Next I misted the heck out of the cloud with Hero Arts silver spray, and the lightening bolts with gold. Love how shimmery these are!

Step 3: Raindrops keep falling on my card…
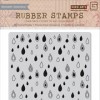
For my card base, I made a top folding card with tide pool layering paper, then I used the Hero Arts/BasicGrey Raindrop background — but with a twist! I first inked the stamp with VersaMark ink, then I daubed on tide pool and white on some of the raindrops. Then I heat embossed it all with clear sparkle powder.

By putting the VersaMark down first I was able to get a good embossing.
Step 4: Trim

Next I trimmed the card base so that it would fit into an envelope. Then it was just a matter of putting it all together.
The Finished Card
Here’s a look back at the finished card:

I wish you could see how shimmery the sprays + the clear sparkle embossing powder are in real life — the camera doesn’t quite capture it.


I love how it fits in the envelope, too!


Oh and! The “sending sunshine” message is from the Lisa’s Mix & Match messages set. Sure hope it makes my Dad smile. :)
Giveaway
A2Z are giving away a $50 gift certificate to their store to one random commenter from all the stops, yay! Just so you all know, the giveaway can be used on anything in the store — not just digital. How generous is that? The giveaway will close at 11.59 pm Sunday 31st August and winners will be announced in the A2Z blog on 3rd September. So be sure to leave a comment here before you hop along to Michelle’s blog! Wait until you see what she’s made — she even has a video for you!
Supplies
Thanks so much for joining me! xx


Love your card, Lisa! I’ll bet your dad will, too. I can imagine how the sparkle looks on the cloud & lightning bolt. Thanks for the how-to instructions as well.
Super cute card!!!
[…] Lisa Spangler […]