You would think taking a photo of a card would be easy, right? After all, it’s just a piece of paper. But it’s not. Nooooo, cards are tricky little creatures.
If it’s a folded card, you want to show a little of the top or the side so that you can tell it’s not flat. (And you don’t want it to look wonky, either! You know what I mean by wonky: too wide on top or bottom, crooked, or like it’s in a time warp being stretched out of proportion.)
And if it is a flat card, then you want to put a little life in it and make it look, yep, not flat!
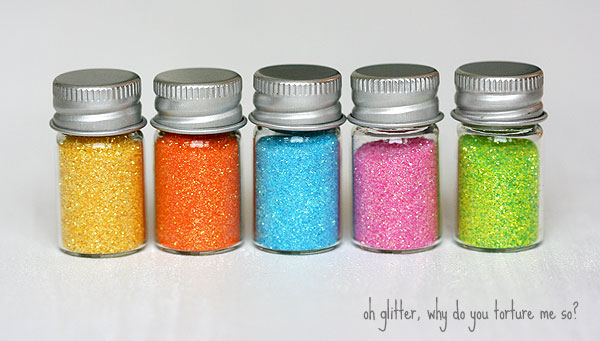
And don’t even get me started on showing dimension, and closeups of nifty little details and such, like glitter and embossing. Especially glitter. (Oh glitter, how I love you! But sometimes you make me want to pull my hair out when you make it hard to photo your sparkly goodness!)
Or how you setup your card outside so that you have better light, and then the wind comes along just as you’re about to press the shutter and your card goes flying out into the street and gets run over by a car. Squish. Gulp.
Oh yes, card photography is hard.
Now, I’m not an expert on card photography — or any photography for that matter. I’ve never had a class on photography of any kind, not to mention card photography. But, people keep asking me how I take the card photos that are here on my blog. So, I thought do a series of photo tutorials dedicated to cards. Here are some topics I have planned for the series so far, not particularly in this order:
- Lighting, location, and white balance
- Taking a good exposure (where to focus, shutter speed and aperture, when to use a tripod)
- A post on each of top fold, side fold, long skinny cards, and flat cards (with a focus on how to make all of them not look wonky)
- Closeups and embellishments (especially tricky glitter, which will be in its own post!)
- Props and styling
- Equipment and tools, including photo editing software (including free, online, and others), cameras and lamps
- Where to look for inspiration
There will probably be even more once we get going — there’s so much I want to share with you! I have enough ideas buzzing around in my brain to fill a book! (Maybe someday I’ll do an ebook! Would you like that? Let me know.)
I’m hoping that you guys will all leave comments as we go along with your questions and any problems that you’re facing. I won’t claim to solve every problem — sure wish I could — but I want to try and help! :)
One thing I wanted to mention right up front is that I think you can get a great photo of a card with any camera that you have. Even cell phone cameras. You just have to know your camera’s limits and take them into consideration. (I’ll talk about my cameras and lenses in a future post.)
For each post in the series, I’ll be linking you to a printable card or give other resources so that we can all take photos of the same sort of card and compare the results. I’m one of those people who believes that practice really does make a world of difference — I’ve been practicing taking photos since 1989, and I’m still learning! And, I’m also a visual person so I like to *see* what I’m doing — and that’s what photography is really all about, isn’t it? I’m planning to do some videos, too. I’m thinking we can all link our cards here too so we can motivate each other and get new ideas, too! Kinda like an online class!
And! I don’t think that “practice makes perfect”, as they say. I don’t think there’s such a thing as a “perfect” card photo — or any photo. Practice just makes it where you get a feeling for what you like, and the camera becomes an extension of your mind’s eye so that you can capture a photo just how you want it to look. Taking the photo becomes second nature so that you don’t even have to think. It becomes lotsa *fun*, instead of lotsa frustration. That’s how I feel, anyhow! Hoping that you’ll feel the same way by the end of the series.
Okay, so let’s get started!
For this first post, I want to build a foundation for the rest of the series and talk about light, location, and white balance.
Without light you can’t have a photo, right? (Well, I guess you can but it would just be a dark rectangle, ha ha!) But there’s all kinds of light: morning light, afternoon light, rainy day light, light from your desk lamp as you’re rushing to take a card photo at midnight to meet a challenge deadline…! I prefer to use natural light whenever possible, but I do have a two lamps with daylight balanced compact fluorescent bulbs for emergencies. (More on those in the equipment post.)
I can’t talk enough about natural light — it just adds so much life to a card! I love it. The only tricky thing that I’ve found when photographing cards with natural light is to diffuse it so that there aren’t harsh shadows. Our curtains are white or off white, so they diffuse the light nicely. If your curtains are a different color, you can try hanging a bed sheet or a large sheet of white paper over the window. (Can’t tell you how much that little tip has helped me — before I heard this I used to open all the curtains! Can you believe it?) I just put the card a few feet in front of the window and happily snap away.
Then there’s location. I mostly take photos indoors because I don’t want to risk my card flying out into the street and getting run over by a car…yep, it’s happened! (Plus the neighbors look at me funny when I’m out in the driveway with my white board and cards.) I have several locations in the house where I take photos: in the morning, I either take them upstairs in my little sewing area or on the kitchen table. Afternoons I switch to our bedroom. I’ve even taken photos in the bathtub — lotsa good light bounces around ours because it’s near a window — it turns into a bowl of light! If it’s rainy or night I grudgingly resort to my two lamps.
Along with light comes white balance. White balance is what makes whites look white. It’s what makes colors pop, or subtle soft shades look sweet and not gray and dingy. Usually I just leave my camera on auto white balance (AWB) because I’m lazy. But I’ve practiced enough to know how when my camera will need extra help and I set it to custom, or use one of my camera’s pre-sets for cloudy or other different light conditions. (Like when I’m taking a photo in the room with the off white curtains in the late afternoon.)
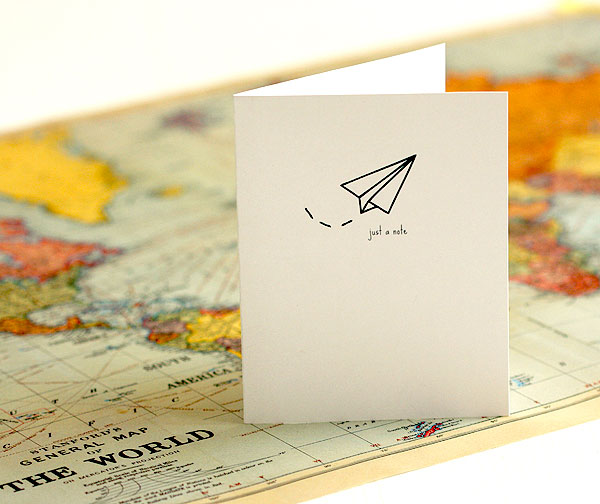
(Photo taken in my bedroom in late afternoon with the light coming in from the right side. Love that warm afternoon sun! It’s also good for naps, too.)
Light, location and white balance all go together like Nutella on toast — delicious!
There are so many things you can do to compensate for bad light, but I’ll save those for another post (this post is getting long enough already, isn’t it?)
Now then, let’s practice! I created a simple little card that we can all use to play around with light, location and white balance. Don’t worry about being perfect or anything like that — the main goal is to just take photos and observe. Pretend like you’re a scientist doing an experiment — white lab coat not required. Really see what is happening with the light, location and white balance.
Here’s your assignment:
- Download the simple little card (sure hope you like it!)
- Print out the card on white cardstock, trim and fold. Printing it on white is key.
- Take a photo of the card in a location that you’ve never used before using auto white balance. You can use a location that you haven’t used for a while if you’re like me and have taken photos pretty much everywhere, ha ha! Focus your camera on the plane, and don’t worry about anything else for now. (Such as whether or not your card is wonky — that will come later. :)
- Observe your photo. Does the white look white? If not, try playing with your camera’s white balance settings (check your camera manual for how to do this. If you’ve lost your manual, most cameras made in the last few years have them online — bonus!). Here’s a tutorial that I’ve written before on white balance that can help, too!
- Link your card here so that we can all see! (I’ve found that linking cards is a great motivator to get them done!)
If you’d like to go further:
- Try several locations! Really explore your home at different times of day. Let us know what photo was your favorite and why.
- Take photos of the card in the same location at different times of the day and see how the light changes
- If you’ve set your white balance and you’re still having problems, check out this tutorial that I wrote on how to fix a photo’s white balance using levels in Photoshop or GIMP.
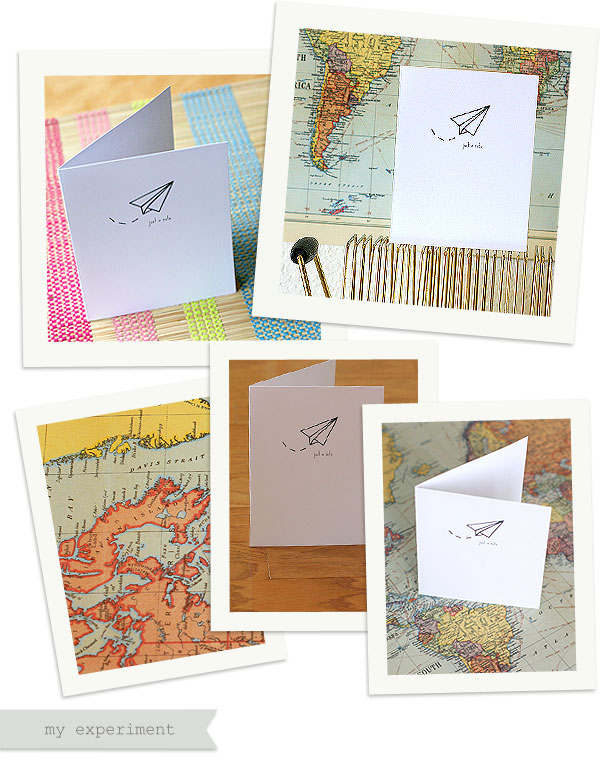
Here are my takes:
Clockwise from top left, these were taken on my kitchen table in the morning, on an old record rack in my sewing studio in mid afternoon, the kitchen floor, and the floor in the bedroom in the afternoon. I kept it on auto white balance (AWB) the whole time. Look how the white has changed in each one:
- If you look closely at the one on the top left, you can almost see the stripes mirrored back up into the card — and that is just plain white cardstock — not glossy or anything like that.
- The top right photo has a greenish blue cast that’s kinda cool, don’t you think? (No pun intended!)
- Check out how the middle photo has a warm tone to it from the wood floor.
- And the bottom left one has a mix of colors.
And my favorite photo? The very last one! I grabbed my map paper and taped it to the bed — wrapping it behind the card to create a background. Now it looks like the little paper airplane can fly around the world and say “hi” to all of you! Yay!
Hard to believe these photos were taken just a few minutes away apart, isn’t it? So that leaves me with one final tip for this tutorial — take lots of photos! After, all they’re only digital. Just delete any that you don’t like. :)
It’s a wrap!
Thanks so much for joining me for the first card photo tutorial! I know that was a bunch of stuff, but hope it was helpful. Future posts will be much shorter, I promise — just lots to cover in this first one.
Now then, go on experiment and have fun! Just play. Then link back and share. Can’t wait to see what everyone does!


Thanks for the great pointers. I’m looking forward to the rest of the posts in the series. Your photos always make me drool, so I know it’s going to be fabulous.
Thanks so much, Avital! :)
Oh this is awesome Lisa, I am so going tp play along, thank you for sharing this!
This is wonderful Lisa! I’m looking forward to playing along but can only do so on the weekends. Thanks so much for these great tutorials!
Wow, wonderful tutorial, I will do my best to play along too :)
Thanks for all the wonderful information! I am looking forward to learning lots from these posts. There is nothing more frustrating than to make a card you really like and then try to share it with everyone and your photos make the colors look totally different than they really are.
Thanks Again!
I need a LOT of help with this! LOL! Thanks for all of the great info. Looking forward to more posts.
Thanks sooo much Lisa! I am a big fan of natural light and chasing it around the house to avoid deep shadows is a game that changes depending on the time of year. Great ideas here – I may try coming inside to shoot. Thanks again – you are super sweet.
will definitely be reading up on your pointers in future posts! thanks lisa!
Wow! That was fantastic, Lisa! I don’t think it was too long at all. Such helpful information. Love your examples and you made it so fun to read too! It’s really late and I’m heading to bed but will definitely be playing along! Can’t wait to wake up and take photos tomorrow! Thank you so much for taking the time to do this for all of us! So sweet! Hugs to you! :)
LISA!! This post is just full of awesome-sauce, as are you. :) I can’t wait to print up the little card & try to take a few pics of it all over the house and see the results. I don’t get a ton of good light (and our weather has been uncooperative), but I’m sure gonna give it a go. Thanks so much for this.
Lisa, thank you so much for all the time and work you’re putting into your photography tutorials, I really appreciate it! I usually take photos indoors and now know my first mistake is to open all the curtains! Thanks for all the tips and information! I’m hoping my pc will be back from repairs before the assignment deadline otherwise I’ll be using the laptop and I find that hard for judging how bright\dark a card looks!
I always love reading your tutorials Lisa as explain the directions as if you were standing right next to me talking to me! Can’t wait to start practising and experimenting with my cards! Thank you!
Oh Lisa this is just what I need – I find photographing projects SO frustrating at times, both inside and outside! BUT I’ve never tried the bathtub – a great idea and I’m going to have a go there for my next photo session. I’m so looking forward to playing along with this series!
Wow!!! Great tutorial Lisa and this is what I need to learn next as even my nice looking cards look so bad because of my photography skills (actually lack of it). Thanks a ton…will try to play along…hope I would get time…need to Organize my time better…lol.
Looking forward to this series Lisa! Photographing my cards is as much fun for me as making them! Now that I’m in the Northeast [i.e. dark as the inside of a cow!] I’m needing a light box… there is no light coming in from any of my windows for the past three days! Will try the experiment later to see how far I can push my camera though!
Lisa, thanks for all the great information! I’m going to try this when I get a chance. I’m looking forward to your other photography posts.
how fantastic are you?! (we all cheer: REALLY FANTASTIC!!) lol
I really need this tutorial (and all the ones that are coming I’d guess!) I LOVE photography and have a good eye for what would make a great photo, but when it comes to actually translating that onto ‘film’ (or camera screen) is another thing altogether, I just have no camera knowledge.
I’m really hoping I’ll get a chance to ‘play and learn’ along with you on this! I’m really excited. Hopefully my kids will give me five minutes to myself this week so I can snap away :)
thanks so much Lisa!
Hi Lisa, thank you so much for sharing your tips! The reason people keep asking you how you take your pics must be because they always look so fabulous. Can’t wait to learn how to get my cards unwarped ;-)
Best regards, Ilona
Wow so much helpful information Lisa! I like the photo samples, they give me instant understanding on how the light affects the outcome of the each!
Great tutorial!